WIRE LABELS
Introduction
Wire labels are used to assign particular net names to groups of wires and pins, and also to assign net properties to specific nets. They are not in fact proper objects in the general scheme of the software. Instead, their behaviour is similar to other labels such as the reference and value labels of a component. It follows that the procedures for their placement and removal are somewhat different from those for other objects.
See Also:
Placing and Editing Wire Labels
To place or edit a wire label:
- Select the Wire Label icon from the Mode Selector toolbar.

- If placing a new label, point at the wire at the position where you want the label to be placed or, for an existing label, point anywhere along the wire or at the label itself.

- Click left to place the label. The Edit Wire Label dialogue form will be displayed.

- Type in the required text for the wire label.
- Click OK or press ENTER to close the dialogue form.
The dialogue form has four tabs. The Label tab carries the label text itself along with its orientation and justification; the Style tab carries the local text style; the Net Class tab assigns the net to a routing class for the layout; and the Differential Pair tab pairs the net with a partner net for differential routing.
Other Controls on the Label Tab
Locked?
Prevents the label text from being edited. This is useful once a net name has been settled and you do not want it disturbed by a stray click.
Auto-Sync?
Keeps every label on the same subnet in step, so that renaming any one of them renames them all.
Show All
Reveals every label on the subnet, including any which have been hidden. The same effect is available for the whole sheet from the Show All Wire Labels and Hide All Wire Labels commands on the wire context menu.
See Also:
See Local Styles for more details of the controls on the Style tab of the dialogue forms.
You cannot place a wire label on anything apart from a wire.
You can also place a wire label from the right click context menu of a wire.
You can place more than one label on a wire. If you wish them all to have the same name, and for all of them to update automatically whenever any of the names are changed, click the Auto-Sync? checkbox.
Proteus will orient the wire label according to the orientation of the wire segment on which it is placed. This can be changed on the Edit Wire Label dialogue form.
To change the appearance of a wire:
- Ensure that the Wire Label Icon is not selected.
- Tag the wire by pointing at it and right clicking.
- From the resulting context menu select Edit Wire Style to launch the dialogue form.
- Uncheck the Follow Global? checkboxes of those style attributes of the graphics style you want to change. If a style attribute and its Follow Global? checkbox are both disabled it is because the style attribute is not meaningful given other attribute settings, either locally or through following the global style attribute.
- Set the style attribute to the required setting.
- Press ENTER or click the OK button to close the dialogue form and keep the changes. Press ESC or click the CANCEL button to close the dialogue form and abandon changes.
To change the appearance of all wires on the schematic, use the Set Graphic Styles command on the Template menu to edit the WIRE graphics style.
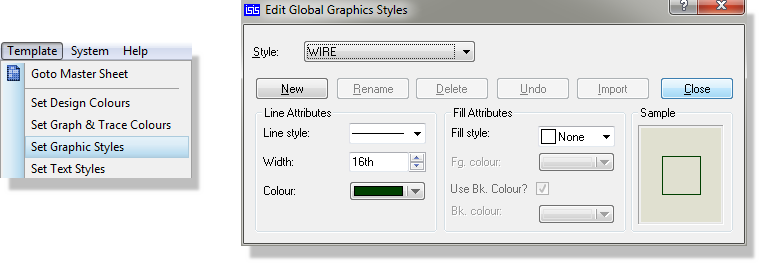
Configuring the style and appearance of wires on the Proteus schematic
See Also:
Deleting Wire Labels
To delete a wire label:
- Select the Selection icon from the Mode Selector toolbar.

- Left click on the label. Both the wire and the label will be selected. Care is required to actually left click on the label and not the wire itself.
- Right click and select Delete Label from the resulting context menu. If this option is not available on the context menu then you have clicked on the wire and not on the wire label. Try zooming in around the wire label to ensure accuracy.

Using a Wire Label to Assign a Net Name
The normal use of wire labels is to indicate that a particular wire, and all the pins to which it is graphically connected, belong to a given net. Then, that group of pins are deemed connected to any other groups of pins which have also been assigned the same net name, even where there is no graphical connection. Occasionally, one may also label particular nets purely for human benefit.
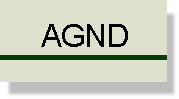
Net name AGND
See Also:
Using a Wire Label to Assign a Net Property
Wire labels are most often used to specify the net class for PCB Layout. The net class is essentially a grouping of nets which have the same characteristics, for example POWER or SIGNAL. Creating your own net classes allows you to set up trace and via styles for routing the board and also to define more granular board constraints (design rules) in the layout module.
To specify a wire as belonging to a net class
1) Right click on the wire and select Place Wire Label from the resulting context menu.
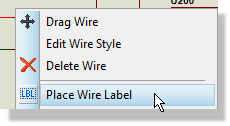
2) Switch to the Net Class tab and click the new button to create a new net class.
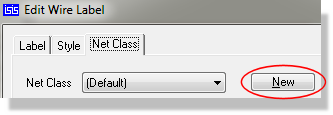
3) Enter a name for the net class and then define the routing styles, via type and ratsnest display on the dialogue form.
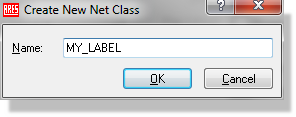
4) Click the OK button to commit placement.
Having set up net classes in the schematic module you can define design rules and clearance with respect of net classes from the Design Rule Manager on the Technology Menu in the Proteus Layout module.
See Also:
Using a Wire Label to Configure a Differential Pair
The fourth tab of the dialogue form, Differential Pair, pairs the net carrying the label with a partner net so that the two are routed together in the layout module. The same dialogue is reached directly from the wire context menu with the Configure Diff. Pair command.
See Also:
Differential Pair Configuration
Wire Label Properties
A wire or wire label (they are equivalent for this purpose) has the following property:
| Property Name | Description |
| NET |
The wire label text |
Wire labels can also be assigned via the Property Assignment Tool but only when it is used in On Click mode. This is because there is no way for Proteus to determine where a wire label should be placed on a tagged wire, unless you mark the position with the mouse.